[Closed] vMix Guide
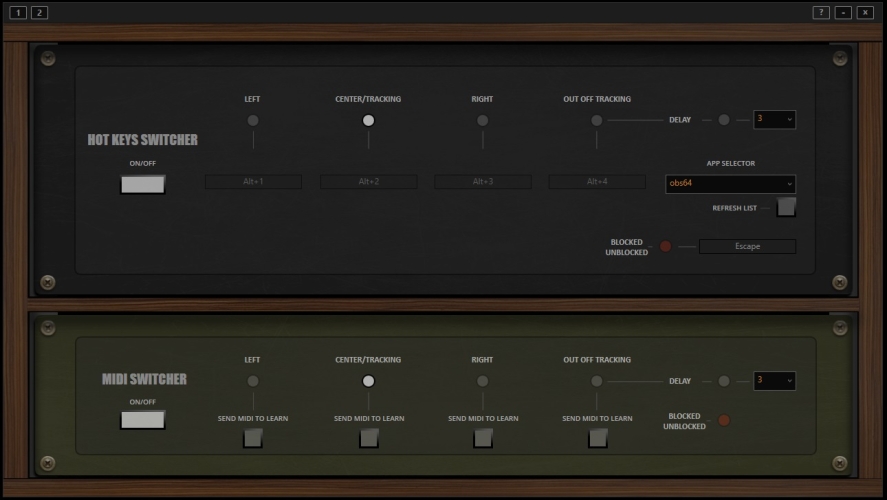
Using the MIDI SWITCHER rack module, you can control vMix.
As a first step, turn on the module and use the Send MIDI to Learn buttons so that vMix can detect the MIDI signal.
Click image to enlarge:
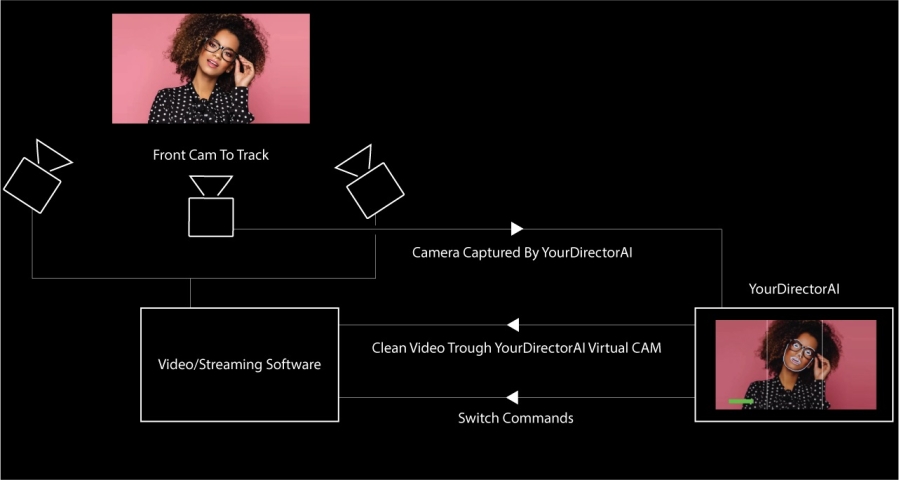
As the main tracker, you can use a standalone webcam, for example, if you want to keep CPU usage as low as possible, especially if your setup has a CPU that is not very powerful.
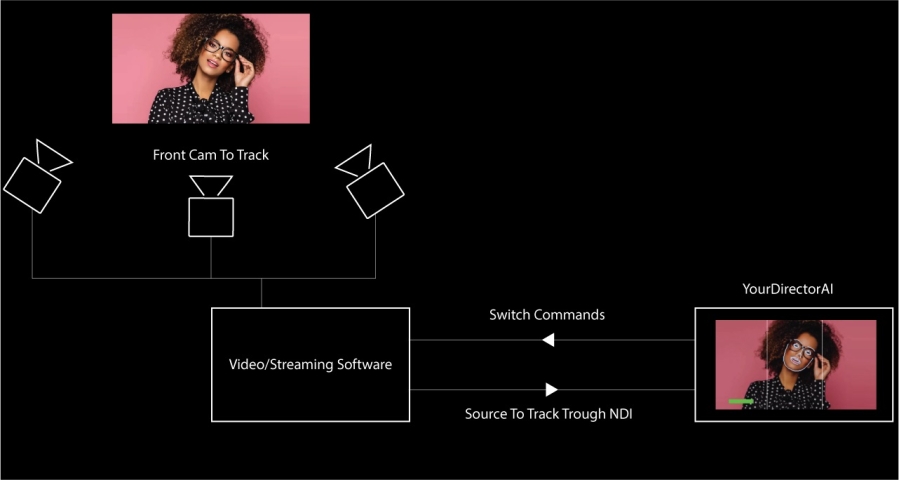
Alternatively, from vMix, you can send the central scene to YourDirectorAI via NDI to track that main scene.
Click images to enlarge:
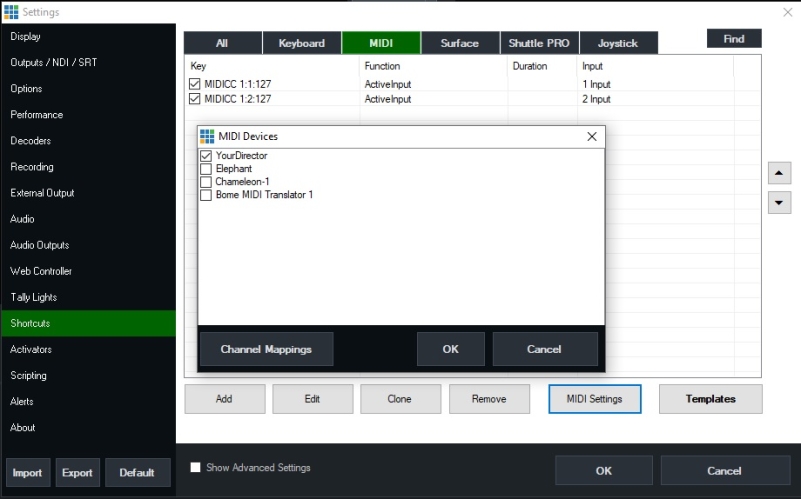
YourDirectorAI provides its own MIDI port. To configure vMix, go to Settings, then choose Shortcuts. Select MIDI, then click on MIDI Settings, and choose YourDirectorAI in the list of MIDI devices and pres ok.
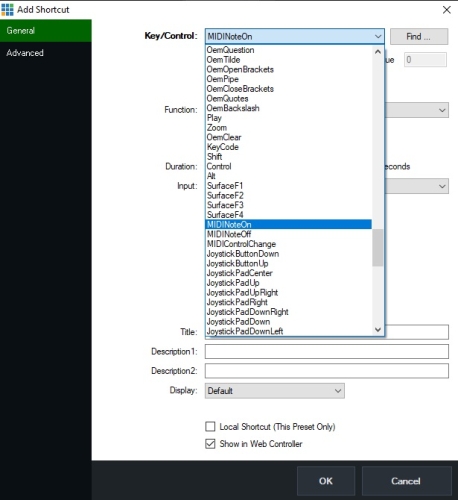
Now press Add button, and select MIDI NoteOn form the list.
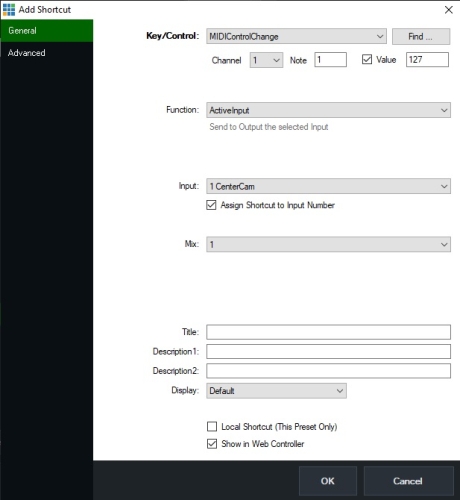
Now you are ready to map MIDI. Just press "Find," and vMix will be ready to learn MIDI signals sent from YourDirectorAI. Simply press the button on your YourDirectorAI MIDI SITECHER device that corresponds to the action you want to assign, such as "Center Camera," then press "SEND MIDI" to learn the corresponding action in YourDirectorAI.
The configuration looks exactly like this. Don't forget to check the VALUE.
Once you've mapped one input, the configuration will look like this, and you can continue mapping other inputs.
At any time, you can pause the switch from the Hotkeys rack module, which includes the mapping to block the switch actions sent by YourDirectorAI. To do this, map a hotkey to the Blocked/Unblocked function. Pressing the mapped key twice will block YourDirectorAI actions; pressing it once will unblock them.
For vMix users, we inform you that the HTTP Web API option will soon be available as another method to control vMix.
Here’s an excellent tutorial created by the vMix team that shows how to use MIDI.
Remember that by activating the help icon in the upper-right menu of YourDirectorAI, tooltips are enabled. Hovering over each function will provide specific help for it.

